Batty for Bunting!
Posted by Sarah Massey-Hicks - Apr 17, 2015
Beautiful Bunting! There are few things that make me feel joy like a simple string of bunting!
In the past few years bunting has moved on from decorating fairgrounds and second hand car dealerships, to gracing the pages of glossy magazines dedicated to décor of all varieties. And what a pleasure it has been to watch bunting grow up from gaudy vinyl, to the many glorious varieties available today. From soft supple strands of fabric fancy, to crisp printed paper prettiness, I have seen the most glorious yarn varieties, not to mention luscious lace!
It is amazing to me that a few strands of bunting in the garden, can make a simple alfresco lunch, feel like something magical. So as you can imagine I have bunting up in the garden permanently.
I must admit though, that I am a bit of a bunting fiend, especially because it is so very simple to make yourself. Now I know what you are saying, “but I can’t sew!” There are so many methods of making bunting, whether you can wield a sewing machine or not, we will find a way for you to create your on strand of bunting joy!
This is my technique for SEWING bunting, but please don’t be put off, if you are not big on sewing. This is the perfect project for a beginner. But, if a sewing machine does terrify you, follow the link to the “batty for bunting” Pinterest board at the bottom of this post. I have pinned various other methods and materials for making bunting, so now there really is no excuse!
Batty For Bunting – How to make it yourself!
The first thing to do is to decide on what type of “flag” you want to use. Personal preference rules here. Although I am a fan of the traditional triangle, I am going to be showing you my method of making bunting using a half moon shape.
Here is the template I used:
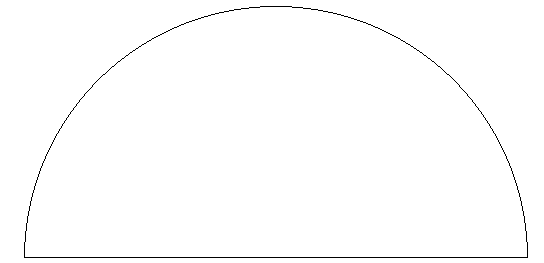
You can really use any shape you like, just remember to add your seam allowance. I normally use 1cm. Cut your template out of something stiff, just to make the cutting process easier.
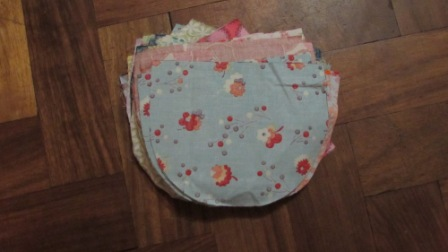
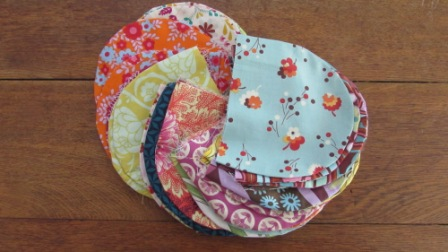
Next step, gather your fabrics. This is my favorite part. I am a lover of beautiful fabric, the brighter the better! For bunting you can use what ever takes your fancy. What you are using it for will normally determine your colour choice. I like to use cotton, something with a bit of body, and not too slippery for this purpose. I used 100% cotton for this project.
These gaudy garlands of mine will be zshoozshing up my girls white blinds, So I have chosen a selection of bright bits and bobs left over from various other projects for this tutorial. Besides your fabric, you will need biaz binding the length of your finished bunting, plus 50cm each side for tying it, And sewing cotton to match your biaz binding.
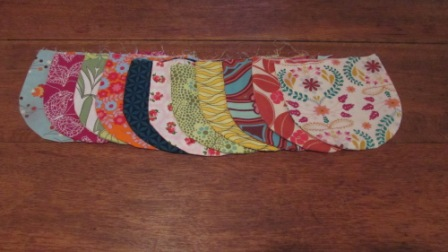
Decide how long you want your finished bunting to be. Measure the length of your flag, and work out how many you will need to fill that length. Next, trace around your template onto your desired fabrics. I normally lay 2 different fabrics right side together to save on cutting time. Pin in the center of your traced pieces, so that when you cut, the 2 pieces stay accurate. You DO NOT want wonky flags! Cut cut cut!
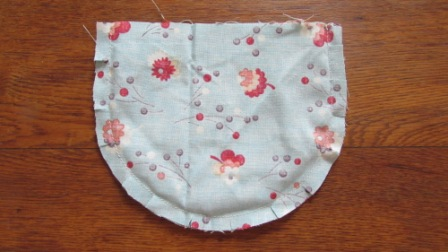
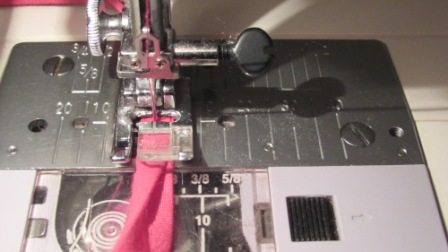
Now whip out your trusty sewing machine. Place your flags right sides together. You are going to stitch your bunting using that 1cm seam allowance that I was talking about earlier, Leaving the top of your flag open to turn right way out. Remember to back tack (this is when you reverse your machine!) at the start and end of your seam, so that your flags don’t start unraveling.
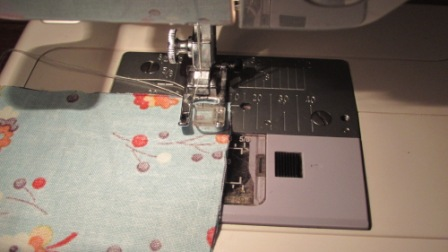
Once you have sewn all your flags together, you are going to need to turn them right way out and press them with your machines trusty side kick, the iron! A handy hint, when sewing curves, any curves, whether it is a collar or a humble curved flag, nipping around the curve before turning it, gives it a much smoother finish.
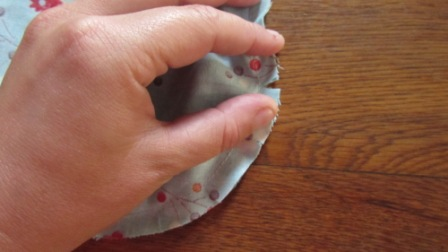
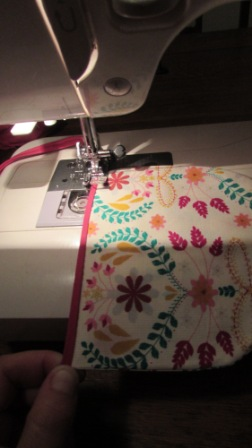
Once all your flags are sewn, nipped and pressed, they are ready to be attached to your biaz binding! This is the final step before you get to hang up your garland of joy!
Cut your biaz binding to your predetermined length, remembering to add the 50cm on each side (for tying). Measure 50cm from the edge of the biaz binding, pin your first flag in place, by folding the binding over the unfinished edge of your flag. Pinning the flags makes it easier, if you are not very confident on your machine. Pin all the flags, end to end. Start sewing from the end of your biz binding, so that you make a neat string for tying. I like to stitch a foot away from the edge of the binding. This puts your sewing line, almost in the middle. Keep stitching until you reach the other end. Tie a knot in each end of the binding, just to give it a neat finish.
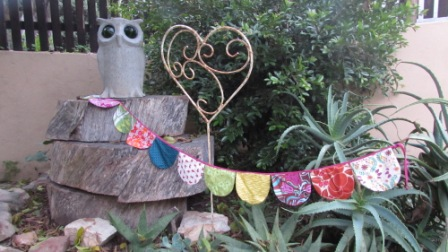
And voila! You have made a brilliant strand of bunting! Don’t you feel clever?!
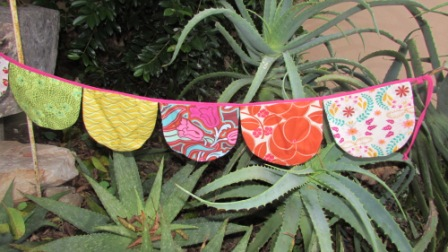
It really is a simple and beautiful thing to make. It is perfect to use to decorate parties. And makes a lovely home made gift.
Follow this link for some more beautiful bunting inspiration.
April 2015 | Comments | 6 Loves |


about the author
A mama, a maker and a lover of beautiful things.
I am the founder and one half of the creative brain behind the ever growing Port Elizabeth based kiddies’ brand, Myang, and I am extremely chuffed to be writing this blog for The Little Pages.
I like to think of myself as a creative mama, and in this blog I would like to share some of these and other adventures with you. My husband and I are both proudly born and bred in the Friendly City and the proud parents of two glorious little girls…the effervescent and gorgeous Princess Olivia as well as her younger sister, the rambunctious and delicious Miss Adia. We live in a gingerbread-esque house with Rosie, our death defying Houdini of a hound and Loki, our ever patient cat. Our household is in a constant state of chaos, full of noise, love, music, food, wine, friends, family, sewing, reading, gardening and JOY! We would not want it any other way.
popular posts
Mar 14, 2016
Ilze is mom to six year old Ceri and five year old Trace who has Down Syndrome. This single, working mom says that her mothering journey has...
Mar 23, 2015
We are super excited to share our first Mom of the Month feature with our readers. Kelly is a beautiful, inspiring mom who is full of joy and an...
Mar 24, 2015
Welcome to My Mama Made It! Thank you for taking the time out of your busy day to read the musings of a creative mom, wife, and entrepreneur.